

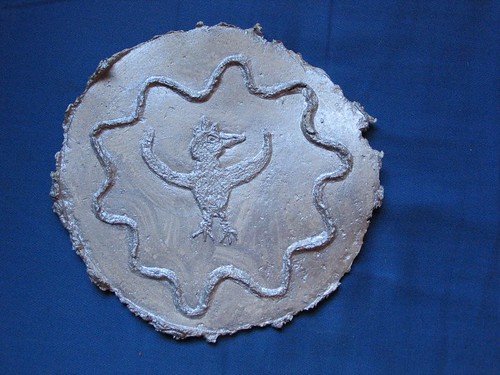
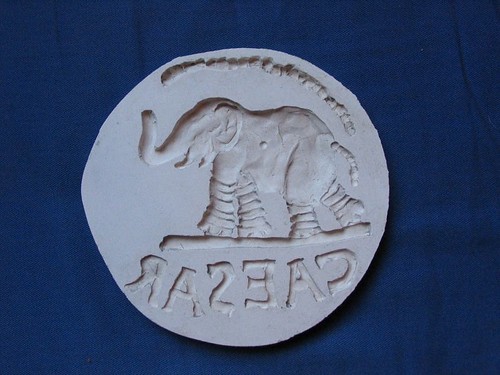
Another of our rather-longer-term projects was Coin-Making, held up by all sorts of technical difficulties in the process. It took all year (well, to be honest, the casts spent months shoved into a cupboard in frustration after the great Plasticine Disaster) but we managed to turn out some display-worthy pieces in the end. The children were Year 5 when they started this project.
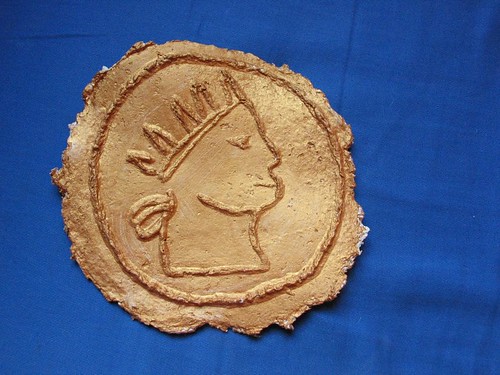
We started by planning the coins on paper, and drawing them about 15 cm in diameter. We put our coin drawings under acetate sheets, but those plastic pocket things would work just as well.
Then we made flat plasticine designs on the acetate. (Next time: use coloured plasticine, not white!) The most successful designs were well flattened, and had no undercut bits. The children used pen tops, brush handles and cocktail sticks to impress patterns and writing on their mouldings.
Next, we made long flat strips about an inch wide and built a circular wall round the coin design. Then I mixed plaster of Paris (not all at once, I think we did two or three coins at a time) and poured it into the wall. If you thump the table a couple of times, the bubbles leave and the top surface smooths out. The stuff takes an hour of so to dry properly. This is my here-is-one-I-made-earlier cast:
The easy part was done. Now we had to dig the plasticine out from the cast. This was where we regretted the white plasticine, as it looked just like the wretched plaster. I trimmed up any little overhangs where the liquid plaster had seeped under the plasticine. Then we had to grease the moulds with Vaseline and an old brush.

We used the sort of papier mache that comes powdery and dry in a bag, and looks like tuna mayonnaise when you add water. We filled the moulds and made the coins about 0.5 cm thick. The stuff took a few days to dry but if you try to take the coins out too soon, the design part will not be dried hard and may break up.
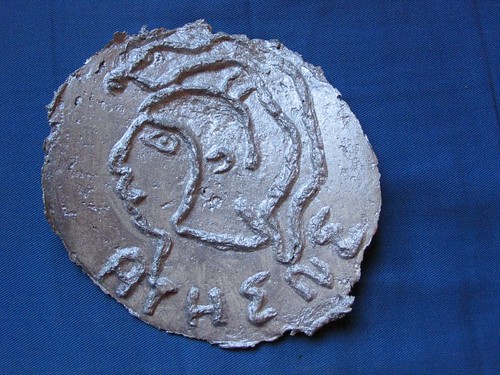
The coins were painted with Berol 'Meltdown' paint, which is water soluble but needs about three coats to look solid. They'll be going on the walls next term.
The coins here were made by Issie, Hetty, Eleanor and Ellie

